
Witcher project
Witcher project
Brief
-you have been commissioned by Netflix to work in the production team on series 5 of the Witcher.
-The Witcher is a fantasy drama streaming TV series. Set in a fictional world, which is medieval inspired in its design, the series explores the legend of Geralt of Rivia and princess Ciri.
-The Witcher is set to start filming series 5 and your brief is to design a new character's hair and makeup to showcase your skills and demonstrate your understanding of the production process from design to completion. you must present your design concept with references and concept art and complete the process through to the final application.

Mise en scene
Translates to ‘placing on stage’. Mise en scene is the stage design and arrangement of actors in scenes for a theatre or film production, both in the visual arts through storyboarding, visual theme, and cinematography and in narrative storytelling through. Meaning everything placed in front of the camera. Mise en scene relies on the key six elements to look for: performance, hair and makeup, costume, props, colour/lighting, set. We can use Mise en scene to detect the mood of the scene/character.
Character profile
character profile

Backstory: Tempest was a fairy confined to a sheltered life in the only grove she had ever known. Until she was banished from her life for her unrequited love for a Witcher. Her love immersed her into a haze which was uneasy to hind until her own mother turned her into the covern of elders. They stripped her of her wings and cast her out leaving Tempest with nothing. Her naivety had deceived her and left Tempest in an all-consuming rage. Her need for revenge transformed her leaving everyone helpless to her new power.
Political: Tempest was never one to get involved or even know of any sort of political decisions or meetings. They had only heard stories of the ancient coven of elders that governed their civilisation. This was all until Tempest was put on trial for loving a different species, especially one which was so hated by their kind. After the banishment their need to confine to the rules of fairy life were completely destroyed as all their trust in a safe political society had left.
Economic: from growing up in a working-class family Tempest has never cared for a lot of money or possessions. They have learned to find use in the things all around them and their conquest for revenge is not one for wealth.
Social: When Tempest did live in a happy world, they loved having their friends and family revolving around them. But they soon learned that trust is a fantasy, and everyone wants something or wants to hurt you. All their loved ones turned their backs after the banishment, so Tempest turned their back on them.
Technology: Coming from a peaceful and rural civilisation, Tempest has never known the technology life. Even after the banishment they never cared for technology and instead looked to dark magic to fuel their revenge.


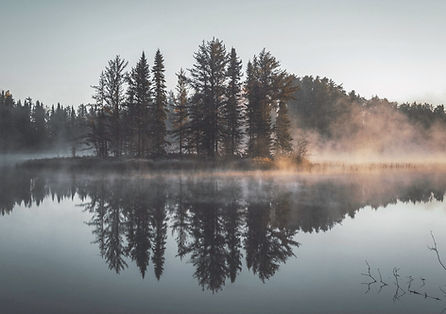
A mood board is an arrangement of images, materials, pieces of text, etc. intended to evoke or project a particular style or concept. A mood board enables a designer to communicate there loose ideas visually to help with the design process and showing others their ideas. When designing a mood board for Tempest I didn't want to focus on the makeup but get a general idea of the character to later design from. I took inspiration from the characters backstory of being a dark fairy living off the woods to create a vison of the whole character beyond the makeup.
Concept art


Makeup designs

When designing a makeup look you can do it digitally or physically using makeup on paper. Digital designs are done on a device and are becoming increasingly more popular as new technology is developed. Some find digital designs easier as they are more portable and mistakes are easier to erase and change. Physical makeup designs are done on thick paper with an outline of a face printed on. The design is then made using makeup products (mainly eye shadow) on top of the template. Physical makeup designs give a more accurate design but aren't as long lasting as digital designs.
For my design I used the digital method as I could repeat the same base and only adjust the makeup without having to keep redrawing the character. in the end I decided on a simple eye makeup with dark face markings stretching across the cheeks and nose.
For the hair I decided on a messy bun I give the illusion of destress and untidiness. I have also added the idea of some sort of dark shinny headpiece maybe made of twigs or flowers to hint to their fairy past.

Name: Tommy Taylor
Age: 16
Height: 5'3
Ethnicity: white British
Eye colour: brown
Piercings: nose
Hair colour: brown
Model profile
Model profile
A patch test is a trail to test weather our model is allergic to anything before we apply makeup onto them. Patch tests are so important to avoid any allergic reactions that my occur from certain products. We tested spirit gum, latex rubber, pro-clean, and pro-stick. We put a dab of each on our models arm and waited 24 hours for the result. Luckily my model wasn't allergic to any of the products we tested.
Since this wasn't a professional project we had to choose our models from the class. I choose Tommy as my model as I believed his face shape fitted may character and concept art the best. The challenge with using a male model is trying to mask his male features to look more feminine. I plan to do this by following a female contour and highlight base routine to achieve this look. I also plan to use a wig to enable a styled hair style for my character.
Patch test
Patch test


Makeup testing
Makeup testing

We tested our makeup a week before we did our final product so we had time to prep and plan for the day. since we didn't have time to test our whole look I skipped testing the base makeup and went straight to the facial markings, eyes, and lips. I started with the facial markings, I started using eyeshadow because I wanted them to have a blurred effect. But I found that the eyeshadow was too thick and make the lines less defined which I didn't really like the look of. For my final look I'm going to use oil based paint blended out at the edges to give a more refined look. I then looked at the lips. Similar to the lines I wanted the edge of the lips to be blurred. I used the darkest shade of lip stick they had in the palette but I still believe it was too bright and I blended it too much. To achieve that dark brown shade on the day I'm going to use the oil painting palette to get the shade I would like and blend it a little less. Finally I tested the eye look I wanted a dark brown and silver eye look with a dark wing and a cut crease. With my first attempt I really struggle to make a sharp line between the silver and the brown. But once the teacher showed me how to achieve a proper cut crease I tried blend it a bit more and though I wasn't completely happy with it I got it to a point were It was ok. Overall with the feedback from my teacher and the testing I feel prepared for the final look.
Application order and product listing
Application order and product listing
For my makeup application I had a list so I knew the order of the process and I was prepared for the final outcome. I also attached a product listing so that I knew which products I would need and would have by me when doing the the makeup, all these things help you be more prepared for the final application. Product listings and application orders are like the recipe for your makeup and can help if you need to leave and need someone to takeover the application, so they know exactly what to do.
Base
-foundation: colour camel NYX full coverage
-concealer: MUA full coverage concealer
-contour: KRYOLAN tv paint stick
-blush
-highlighter: wet n wild 322b crown of my canopy
Facial markings and eyes
-eye shadow: FREEDOM vintage doll purple, glitter silver
-eye shadow: crown 35TC browns, shimmers
-black lines: ATHENA painting palette
Steps
1) Apply foundation in the shade camel to the eye lid to create a base for the eye makeup.
2) Then apply the eye makeup starting with the dark brown (from crown 35TC palette) outline then the silver glitter (from FREEDOM vintage doll palette) into the crease blending occasionally to even out the look, finishing with the black shade form the ATHENA painting palette on the waterline.
3) Finish foundation by applying it to the rest of the face, being mindful of the eye look you just did.
4) Then contour the check bones, nose, and forehead defining the contours of the models face shape.
5) Apply concealer under eyes, forehead, and chin to lighten the skin tone.
6) Then apply the blush onto checks just under the eyes spreading across the nose.
7) Highlight the nose, chin, forehead, above check bone contour, eye crease with the wet n wild 322b.
8) Finish the eyes with a wing lashes and zig zag under eye using the ATHENA painting palette.
9) Then draw out the facial markings with the ATHENA painting palette and add a slight blur effect around the lines using the crown 35TC palette.
10) Then continue with lip makeup using the ATHENA painting palette using the crown 35TC palette to blur the edges.
11) Once the makeup is done finish with the styled wig and any headpieces or other accessories (jewellery, cape, other clothing to make the character).
Styling the wig
Styling the wig

I also styled my wig a week before my final makeup look to save time on the day. I wanted to style the wig in a bun to hint to Tempest's fairy past but a little messy to show how her banishment has effected her. I started trying to replicate the example in the corner but the plats exposed the wig cap too much. So I tried experimenting trying to put the hair in a bun without showing the wig cap. I ended tying two buns, twisting the second one, to create this look. Though I did struggle trying to style the wig I do like the final product, it portrays the backstory well and I love the layered bun look.


Pose board
Pose board
For my pose board I collected a few images of key features I want my character to portray in the shoot. Since I'm planning to paint my models hands black, to show how the dark magic is invading the character, I wanted them involved in the photo as well, so I kept that in mind when sourcing photos for my pose board. I had to look for ways to involve the hand on the face without covering or messing up the makeup which is why the hands are mainly on one side of the face. I wanted to also gather facial expressions to give a very clear image of what I wanted to pose like in the shoot. For the facial expression I wanted to keep it simple with just a general annoyed/ speechless expression to convey her reaction to being banished.


final makeup and evaluation
This was our final makeup lesson where we had to execute a holistic makeup look for the character we have been designing. I really enjoyed this task as it pushed me to do things I have never done before and made me appreciate everything that goes into a single makeup look.
When creating my look, I had a picture of my final makeup design on the wall next to my station that I could refer back too, this helped remind me of some aspects I had forgotten like the shape of the line work etc. I also followed my application order and product list strictly as this really helped give me guidance and allowed me not to panic on the day, though I do wish I had added what brushes I needed on the list as I often found myself running back to get more halfway through the process. Other than that, the makeup application went very smoothly.
I started with the eyes applying foundation and eyeshadow. I was worried about doing the eye makeup after my trail as in the trail they didn’t turn out as I would have wished for, But I believe that that practice and the feedback I received helped me improve upon the day making the eye makeup one of my favourite parts of the final look.
I then moved to doing the base. I believed the base was one of the most important aspects of the makeup to transform my male model into a female. The base was one of the things I didn’t test as it seemed one of the easiest of all the components. The base didn’t turn out too bad, but I found myself looking up where to place the contour and highlighter. If I was to do this again, I would research this beforehand and make sure I had them printed so I could refer to them without stopping the process to look it up.
I later moved onto the line work; the eyeliner and waterline, the zig zag under the eyes, and the facial markings stretching over the nose and checks. Similar to the eyeshadow, I was also nervous about the line work especially the facial marking due to the trail. In the trail I attempted to do most of my line work in a dark pigment of eyeshadow, this caused large messy lines that I found hard to control. So my model suggested using oil paint instead. On the day when I did use oil paint it made my lines much more precise and easier to control, though I did have to fix some with concealer, they became my favourite part of the whole makeup and really gave a professional finish to the look, carrying the characters story well as well.
I then moved to the lips. I believed the lips were one of the most important parts of the makeup as they would help turn my model from a boy to a girl. I decided to use a dark purple lipstick for the look rather than a brown as I believed that the purple highlighted the more feminine lip shape better. In my trail I had also decided to blend the edges to create a more blurred edge, But upon the day I decided against this as I believed I took too much of the shape away.
Finally, I painted the one hand black. I choose to do this as it helped further her backstory of her evil power taking over her and conceptualised this into the makeup look. Though painting one of the hands wasn’t in my original plans I’m glad I did as I believe it really improved the look holistically showing that the character has been executed all the way down to the finger tips.
I finished the look with a wig that I had previously styled, a headpiece that I made at home, and a jacket.
In conclusion I’m very pleased with what I achieved in a whole. I truthfully really like the makeup look and the character I have created and really enjoyed the experience. If I was to attempt this again, I would try and lean more into her story creating a more evil and dark makeup look. I would also research more about base makeup to further the transformation of my male model to female and make a more thorough plan. I hope to carry these improvements into my next classes set, props, and stage management.

